Monday, October 7, 2013
Wednesday, September 25, 2013
Project Research Blog – Part 1 (The Interface)
» I can create a blog using Blogger.com to communicate my project ideas
» I can completely customize a blog for aesthetics, organization, & smooth navigation
» I can create a custom organization system with smooth navigation using “labels” & “Pages"
» I understand the responsibilities and ethics associated with publishing to the internet
» Create a clear organizational system using labels & pages for the following areas. Use these for the page names: OVERVIEW, INITIAL RESEARCH, DESIGN, PLAN, CREATE,
and FINAL PROJECT. Use these for the label names: Overview, Initial Research, Design, Plan, Create, and Final Project.
» Create a new “test” post for each label.
» Remove the “About Me Gadget”
» Remove the “Blog Archive”
» Turn off the Navigation Bar or Navbar
» Apply a color scheme that reflects your project theme
» Create a custom header image that reflects your project theme
» Assign every post an appropriate label.
What is a “Project Research Blog?”
Your Project Research Blog must be clearly divided into: Initial Research, Design, Plan, Create, Evaluate, and Final Project.
Here is my Example: http://goDEVO.blogspot.com/
Project Research Blog Setup Notes:
Turn off Navbar << Show Me How >>
Remove the “About Me” gadget
Remove the “Blog Archive” gadget
<< Show Me How >>
Monday, September 16, 2013
Fun with nCloth
» I can implement the nCloth tool in Maya.
» I can manipulate nCloth attributes for a desired result.
» You are to create 3 renders applying 3 different custom presets.
» Each cloth object should have a reflective material applied and rendered using indirect lighting.
» Describe each attribute change made and the results.
*Document in blog.
Monday, November 7, 2011
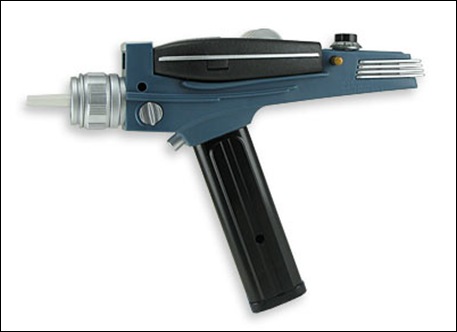
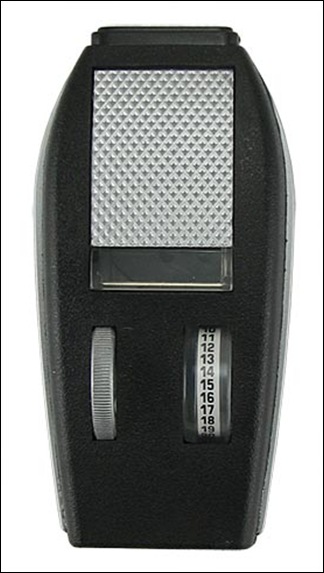
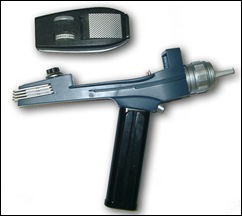
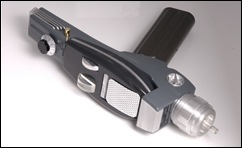
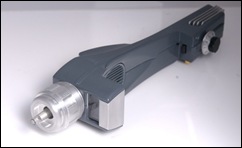
Star Trek Project Reference Images
http://www.3dbuzz.com/vbforum/sv_video.php?search=phaser
You need an account.
You need to update your Flash plugin.
Click To Enlarge!! Then right click and save.






Wednesday, January 12, 2011
Saturday, November 27, 2010
We are on Facebook
Hey Guys . . .
Hope you had a great break, I did and ate way too much.
I love 3D and anything associated with it. About 2 years ago, I started a site called www.3DStudents.com sharing all the cool things I find related to the 3D industry. If you think you might be getting into 3D, it is addictive, check out the site www.3DStudents.com. Friend it on Facebook and if you are not a big fan of Facebook, you can subscribe to it on the site. Press the “LIKE” button on the top of the page. I have been finding a lot of cool stuff these days.
http://www.facebook.com/home.php?#!/pages/3DStudentscom/128725010507595
AND of course Friend our program Digital-Evolutions on Facebook as well, so you know what the other students are up to. Press the “LIKE” button on the top of the page.
http://www.facebook.com/home.php?#!/pages/Digital-Evolutions/183586665794
See you Monday!
Cornell
Monday, September 13, 2010
Homework Assignment 1: Composition
Read article on composition:
http://www.morguefile.com/docs/Jodie_Coston:_Lesson_1Thursday, September 2, 2010
Syllabus for Advanced 3D Graphics
Advanced 3D Graphics 2010 - 2011
Most people think of 3D animation as the visuals that make blockbuster movies and video games possible, but the applications for this art form go well beyond entertainment venues including: architecture, medical, aerospace, engineering, historical recreations, archeology, biotechnology, and forensics. Surprisingly, only about 3% of all computer animation produced is for the entertainment industry.
This course is an intermediate course to of 3D graphics. Students will study advanced level methods and techniques involved within the industry. The curriculum is designed to give the students a foundation to 3D graphic tools and the confidence and skills to attack any new application. This intensive semester long course guides students to develop aesthetic, conceptual, and technical knowledge of design, while allowing students to progress at their own pace and ability. It will also help guide them to become active independent learners, better preparing them for any future career. This course is ideal for artists, and students pursuing careers in architecture, engineering, the medical industry, forensics, graphic design & advertising, industrial design, game design, entertainment industries, and any industry that deals will visual communication. *Meets MYP technology requirements
ATTENDANCE: Regular attendance is essential; classroom content is sequential and classes missed will affect student’s performance. Attendance is taken at the beginning of class; students need to be in their seat at the bell.
ABSENCES: Students will not be allowed admittance into class without a re-admit slip that indicates if the absence is excused or unexcused. Refer to the Parent/Student Handbook for questions related general school rules and policies as it will be followed in my class.
-- GRADING --
The Student's grade will reflect the work done on their independent projects, guided projects, assignments, sketch plan book and participation. The final grade will be based upon four categories: In-class grade - 10%, practice assignments - 30% final assignments – 40% and final exam - 20%.
IN-CLASS GRADE - 10%: Students are given 20 points per class for participation, performance and work ethics, points will be deducted for inappropriate use of time. (Examples: playing games, use of computer during lecture, Instant Messaging . . .)
PRACTICE ASSIGNMENTS – 30%: These assignments will consist of guided skill lessons and projects. *Grades will be weighted based on classroom time allotted.
FINAL ASSIGNMENTS – 40%: These assignments will consist of coached final projects. *Grades will be weighted based on classroom time allotted.
FINAL Exam – 20%: The final exam will consist of a video demo reel, final project, and vocabulary enrichment exam. *Grades will be weighted based on classroom time allotted.
BE HONEST: Cheating on assignments will not be tolerated and will result in a zero and parents will be contacted. Asking and allowing another person to copy an assignment is cheating and both people are at fault. Again, see the Parent/Student Handbook for further information.
CLASS WORK: Students need to be in their seat and be ready to begin work when the bell rings.
HOMEWORK: Homework will be given occasionally, majority of assignments need to be completed in class do to software and computer availability.
EXTRA HELP: Any time a student is in need of help, she/he can come and see me Monday, Tuesday, Thursday, or Friday mornings from 7am to 7:45 am (appointment). We also have open studio every Tuesday from 3pm to 5pm.
MATERIALS: I highly recommend, NOT REQUIRED, that students purchase a thumb drive for portable storage and file back-up (minimum of 2 Gig). They are sold at any computer store and range from $6 - $10.
Students will be required to keep an ongoing portfolio of digital images as an archive as well as for documentation. These photos/images (ideally) will be taken as products are completed.
If you have any questions, please feel free to contact me.
Dan Cornell - DCornell2@cherrycreekschools.org
Tuesday, May 4, 2010
Pop Can Notes v1
http://devotutorials.blogspot.com/2010/05/pop-can-model-notes-v1.html
Tuesday, March 9, 2010
Rigging Reverse IK Foot - Notes V1
http://devotutorials.blogspot.com/2010/03/rigging-reverse-ik-foot-notes-v1.html
Monday, February 1, 2010
Wednesday, January 20, 2010
TUTORIAL: Screwdriver Mental Ray Rendering click for larger version
This is a basic modelling tutorial that will teach you how to make a screw-driver and render it with FG (Final Gather) With global illumination, HDRI (High dynamic ranged imagery) And DoF (Depth of field, optional).
Let us begin shall we, open Maya, and go to the modelling section. Now create a polygon cylinder on it's X axis, with 30 subdivisions around axis, 5 subdivisions along height, and 32 subdivisions on it's caps.
Now take your scale tool and scale the cylinder out on it's X axis a bit, like in the image.
Go into vertex mode, go at a side view of the cylinder, select the two middle spans.
And scale it using the middle scale button to make them smaller, and then select the span closest to the end of -X half of the cylinder and move it close to the end spans
Now select the end spans on the -X end and move them closer to it's nearest span
Select the 4'th span and scale it with the middle scale button to make it a bit larger, then move it closer to the 3'rd span on the -X end.
Select the two end spans, and scale them on their X axis, then move it to the -X direction.
Ok, we're pretty much done with it's basic shape, we'll need to boolean some sphere's into this, let's create a sphere with 30 subdivisions around it's axis, and 30 subdivisions along it's height on it's Y axis
Now we're going to scale it with the middle scale button, to make it smaller, and move it into position over the handle
Now dupilcate the sphere, and move it on the exact underside of the handle, try to make it as deep in on the handle, as the top sphere is.
Now select both spheres, then hit CTRL+G, to group them, then select your rotate tool, and hit CTRL+D to duplicate the spheres, then rotate them along the edge, keep doing this
Now smooth the handle twice Polygons>smooth
Combine (polygons>combine)all the spheres, then select the handle first, then select your combined spheres, then boolean difference them (polygons>booleans>difference), if your screwdriver handle dissappears, undo all the commands until your spheres are seperate, and then boolean them individually, if that doesn't work, start over with making your spheres. (what I had to do)=
Ok looking pretty good! Now we will start on the screw-drivers shaft. Create a polygon cylinder with the same settings as the last one, then scale it with the middle scale button to make it smaller, then scale it out on it's X axis
Now we're going to make it a standard bit end, select the three spans on the -X end, and scale it on it's X axis to make them closer together and then move them in the -X direction
Now select the two end spans, and scale them on it's +Z axis
Now scale the end on it's X axis to make the edge a bit long
Ok, we've got the screwdriver model done, now we're going to go on to the materials, and render settings! Ok, select your shaft, and go into the rendering section, lighting/shading>assign new material>Dgs_material
Ok that's good enough for that! Now we'll make our handle a "Dieletric" material, go to lighting/shading>assign new material>Dieletric_material, give it any color you like, I chose a yellowish color by clicking the "col" white block, you can select a color for it.
Alright, now we're going to set the scene up for rendering, select your screw-driver, and move it up some, so that it's resting atop the grid, then create a polygon plane on it's Y axis, doesn't matter how many subdivisions it has, and apply a lambert material to it Lighting/shading>assign new material>lambert, and make it a tanish color
Now create an ambient light, with no intensity, make it cast shadows, then go to render globals Select mental ray in the drop down menu (if it's not there go to window>preferences/settings>plug-in manager, and check mayatomr) apply these settings in the render globals:
min sample level 1
max sample level 3
RAYTRACING SECTION, move all the sliders up to 10 except the shadow trace depth attribute
FINAL GATHER SECTION, check final gather, final gather rays 500
IMAGE BASED LIGHTING SECTION, click create, if you do not have an HDRI map, E-Mail me at bartonix@gmail.com and I will send you one, now over in your attribute editor for your HDRI map, apply these settings:
Make sure the mapping is on angular, and that you find where you saved your HDRI map
---------------------------------------------------------
Optional DoF
---------------------------------------------------------
for DoF you're going to need an extra screw-driver, a bit further away from this one. And perhaps a different color handle. I chose a blue-ish purple color
Ok, once you've duplicated your screwdriver and moved/modified it, select the screwdriver you want your camera to be focused on and go to display>heads up display>object details. Now on your new HUD, find it's distance from the camera and either write it down in note pad and copy it, or remember it. Now select the ground plane, and hit the right arrow key until you come upon the perspective camera (perspshape) scroll down to the mental ray tab on it, and click the little box by the attribute "Lens shader" scroll down and find the lenses in the pop up, and select "physical_lense" now on the attribute "plane" type the number the distance of the camera is, and put a - infront of it, (this will work in most cases, if not, put a +) now render!
Hope you had fun!
Some errors happend and two images wouldn't show up, I don't know if this link will work but to see the tutorial in it's origonal state go to http://micah.noobgrinder.com/screwdrivertut/ And also visit my dA http://www.micah.noobgrinder.com http://thunor.deviantart.com
Friday, January 15, 2010
The Third & The Seventh: Short Film
This is an amazing 3D project and it was all done by one guy - Alex Roman. A FULL-CG animated piece that tries to illustrate architecture art across a photographic point of view where main subjects are already-built spaces. Sometimes in an abstract way. Sometimes surreal.
The Third & The Seventh from Alex Roman on Vimeo.
Credits:
CG
|Modelling - Texturing - Illumination - Rendering| Alex Roman
POST
|Postproduction & Editing| Alex Roman
MUSIC
Sequenced, Orchestrated & Mixed by Alex Roman (Sonar & EWQLSO Gold Pro XP)
Sound Design by Alex Roman
Based on original scores by:
Michael Laurence Edward Nyman. (The Departure)
.Charles-Camille Saint-Saëns. (Le Carnaval des animaux)
Directed by Alex Roman
Done with 3dsmax, Vray, AfterEffects and Premiere.
EDIT: Original MP4 torrent if you're interested. Thanks to Brennan ;) temporarygate.com/TheThird&TheSeventh.mp4.torrent
thirdseventh.com/
third.seventh@gmail.com
Wednesday, January 13, 2010
Entertainment Webcast Series: Autodesk 3ds Max and Maya Tips & Tricks
Autodesk 3ds Maya Tips & Tricks
Deadline: 2010-Jan-13
Location: Online
Keynote Speaker: Steven Roselle, Marcel de Jong and Lee Fraser
To register for this webcast
Description: Join Steven Roselle, Marcel de Jong, and Lee Fraser, Autodesk Technical Specialists, to hear about their favorite production tips and tricks in Autodesk® Maya®.
Many of these tips and tricks are best practices that will increase the productivity and creativity of your daily work. You'll also learn some of the latest features and techniques being used at the most innovative studios.


